Refinishing cabinets can be a challenging and time-consuming project. It’s important to work carefully and be patient. Rushing can lead to missed details or uneven finishes. Choosing the right finish is essential for style and durability. This guide will help you make informed choices that align with your kitchen’s layout and lifestyle.
Preparation
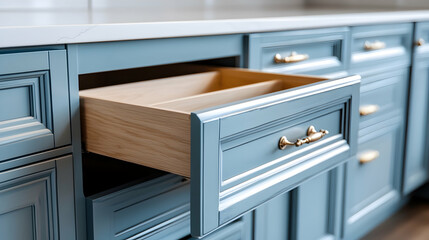
San Jose Cabinet Refinishing is an affordable, eco-friendly way to upgrade the look of your kitchen. This project can be completed in one weekend and offers transformative results that can boost your home’s resale value. Choosing the right cabinet refinishing products is essential to the success of your project, as low-quality products can cause damage to your cabinets and lead to a poor result.
To ensure that your new finish will last, it’s important to clean the surface before applying any stains or paints. A wood cleaner is a good choice as it cuts through kitchen grime and leaves a fresh surface for applying finishing products. A degreaser is also useful as it can help remove stubborn dirt and grease. Be sure to use a degreaser that is safe for cabinets, as some may contain harmful chemicals.
Next, sand the cabinet surfaces until they are smooth. This step is particularly important for bare wood, as it will allow the coatings to adhere better and provide an even finish. If there are any scratches or dents, tend to them with a wood filler and sand again until smooth.
Lastly, apply a high-quality primer to the cabinet frames and doors. A primer like KILZ 3 Premium Primer offers excellent adhesion and stain-blocking properties, and dries quickly for minimal downtime. It’s also water-resistant, making it a great choice for your kitchen.
Once the primer has dried, you can reattach the cabinet doors. Be careful to reference your labeling system as you return each door to its proper location. Once the cabinet boxes and doors are reattached, it’s time to add the finishing touches. Add some fabulous hardware knobs and pulls to complete the look and make your kitchen feel brand new!
Sanding
Refinishing your kitchen cabinets is an easy, cost-effective way to dramatically update your home. It’s also an eco-friendly option, minimizing waste and saving money by reusing existing materials. Before you start, make sure you’re familiar with the process and have all necessary tools and materials. Then, decide on your desired color and finish. Bold colors like navy blue and forest green are dramatic choices that create a modern look, while neutral tones like whites and grays can give your space a more timeless feel. If you opt for a stained finish, be sure to test the color on a small area or sample board before moving forward with the project. It’s also important to lightly sand between coats of paint and stain for a smooth, even finish.
Before you start sanding, it’s important to protect your workspace and protect surrounding surfaces with drop cloths. Then, empty your cabinet boxes and remove all hardware from the doors (including hinges). If you plan on reinstalling the original door handles and hardware, label them with a number or letter to make reassembling the cabinets easier.
The sanding process can be tedious and messy, but it’s a vital step in your refinishing project. Use a sanding sponge and medium-grit sandpaper to scuff the surface of your cabinets. Then, vacuum and tack-rag the cabinets to remove any dust particles. It’s also a good time to caulk any cracks where your cabinets meet the walls or crown molding.
A high-quality primer is an essential finishing touch for your cabinets. It ensures that your new paint or stain will adhere to the surface and helps keep moisture-prone areas like a kitchen from growing mildew. Before you apply your primer, lightly scuff sand the surface again and vacuum and tack-rag to remove any dust.
Primer
Cabinets take a beating from opening and closing them, spilling, splashing, and scrubbing. Over time, a near-invisible layer of grease and cooking oils can build up on the surface, creating a barrier that prevents paint from adhering properly. This is why priming is so important.
A good quality primer will help to create a smooth base for the first coat of paint. It will also help to block stains, cover porous surfaces, and even out texture. Kitchens typically have high humidity levels, so opt for a primer that is moisture resistant as well. KILZ 3 Premium Primer is a great option since it dries quickly, has excellent adhesion, and is mildew resistant.
After the cabinets are thoroughly cleaned (a degreasing product like Krud Kutter works well), a light sanding is required to ensure that the primer adheres. A pass with a 220-grit sanding block will give you a nice smooth finish that will hold up to the wear and tear of a kitchen.
Once the sanding is complete, you can start to prime. You can roll or brush the primer, depending on your preference. If you are using a spray painter, be sure to use a low VOC product like BIN Shellac Based primer. You can then follow with a water-based topcoat or an oil-based paint, such as an alkyd, like Sherwin Williams Backwoods, whichever you prefer.
If you are painting over a dark shade, you should consider a tinted primer. This will allow you to skip the second coat of a dark shade of paint, saving you money and time! You will want to lightly sand between each coat, as well, to get the smoothest finish.
Paint
Whether you’re painting over existing cabinet color or changing up the style, choosing the right paint is the most important step of this whole project. It’s worth it to invest in high-quality, durable kitchen cabinet paint that will look beautiful and stand the test of time.
While oil-based paint was once the best option for cabinets, newer water-based formulas are JUST as durable and can be used DIY-style. They also dry much faster and don’t give off as many strong fumes, which is a win for any home remodeler!
When browsing paint aisles, be sure to read labels carefully. Look for words like “urethane” or “elastomeric” to ensure the paint you choose is durable enough for your kitchen cabinet surfaces. Also look for a high-quality primer, such as Fresh Start High-Hiding All-Purpose Primer (a favorite of professional painters). This will help the new paint adhere well to the surface and hide any imperfections that may be visible under the old finish.
Before you begin, score the tops and bottoms of all hinge hardware with a box cutter or utility knife so you can easily align the hinges when re-installing your doors. Next, label all cabinet boxes, hinge hardware, and cabinet doors so you can easily identify what goes where when you’re ready to re-assemble your kitchen!
Once your surfaces are prepped and primed, you can get to work. Start with the backside of the cabinet doors and drawer fronts, applying a coat of primer to each piece. Be sure to let the primer dry completely before moving onto the front side of the cabinets and drawers. You can use a brush or foam roller, but I recommend using a foam roller for the larger areas of the kitchen cabinet paint job.
Finishing
Refinishing kitchen cabinets is a rewarding DIY project that can breathe new life into your home. It’s also a cost-effective alternative to replacing cabinetry. To ensure the best results, be sure to prepare for this labor-intensive task by emptying all cabinet contents and covering floors and countertops with drop cloths. You’ll also need to use a degreaser, like trisodium phosphate (TSP), to cut through grease and grime that can cause your paint or stain to crack. Finally, you’ll need to sand all surfaces to remove the old finish and create a smooth, paintable surface.
Next, prime the cabinets with a high-quality primer like KILZ 3(r) Premium Primer. This product dries quickly and provides excellent adhesion to promote an even final appearance. It also contains stain-blocking ingredients to protect the cabinets from stains and water damage in the future. Apply the primer using a brush or roller, and work in thin coats to avoid drips and runs.
After the primer dries, it’s time to stain the cabinets. Choose a color and finish that suits your design style. For example, a natural wood finish embraces the beauty of the grain patterns and knots to create a warm, organic kitchen aesthetic. Or, you could use a clear lacquer to maintain the modern look of your kitchen and provide an easy-to-clean surface.
Once the stain dries, you can add an additional layer of protection by applying a polyurethane sealer to the cabinets. Follow the manufacturer’s instructions for application method and drying times. Then, refer to the labeled hardware baggies and pictures you prepped earlier to reinstall the cabinet doors and drawer faces. With a little patience and effort, you’ll have beautifully refinished kitchen cabinets in no time.